As an Amazon Associate I earn from qualifying purchases.

Making homemade rye sourdough bread is a deeply satisfying process. The earthy aroma, chewy texture, and tangy depth of flavor make it a favorite among bread lovers. This rye sourdough bread recipe ensures a flavorful, hearty loaf that’s perfect for sandwiches, toasting, or simply enjoying with butter.
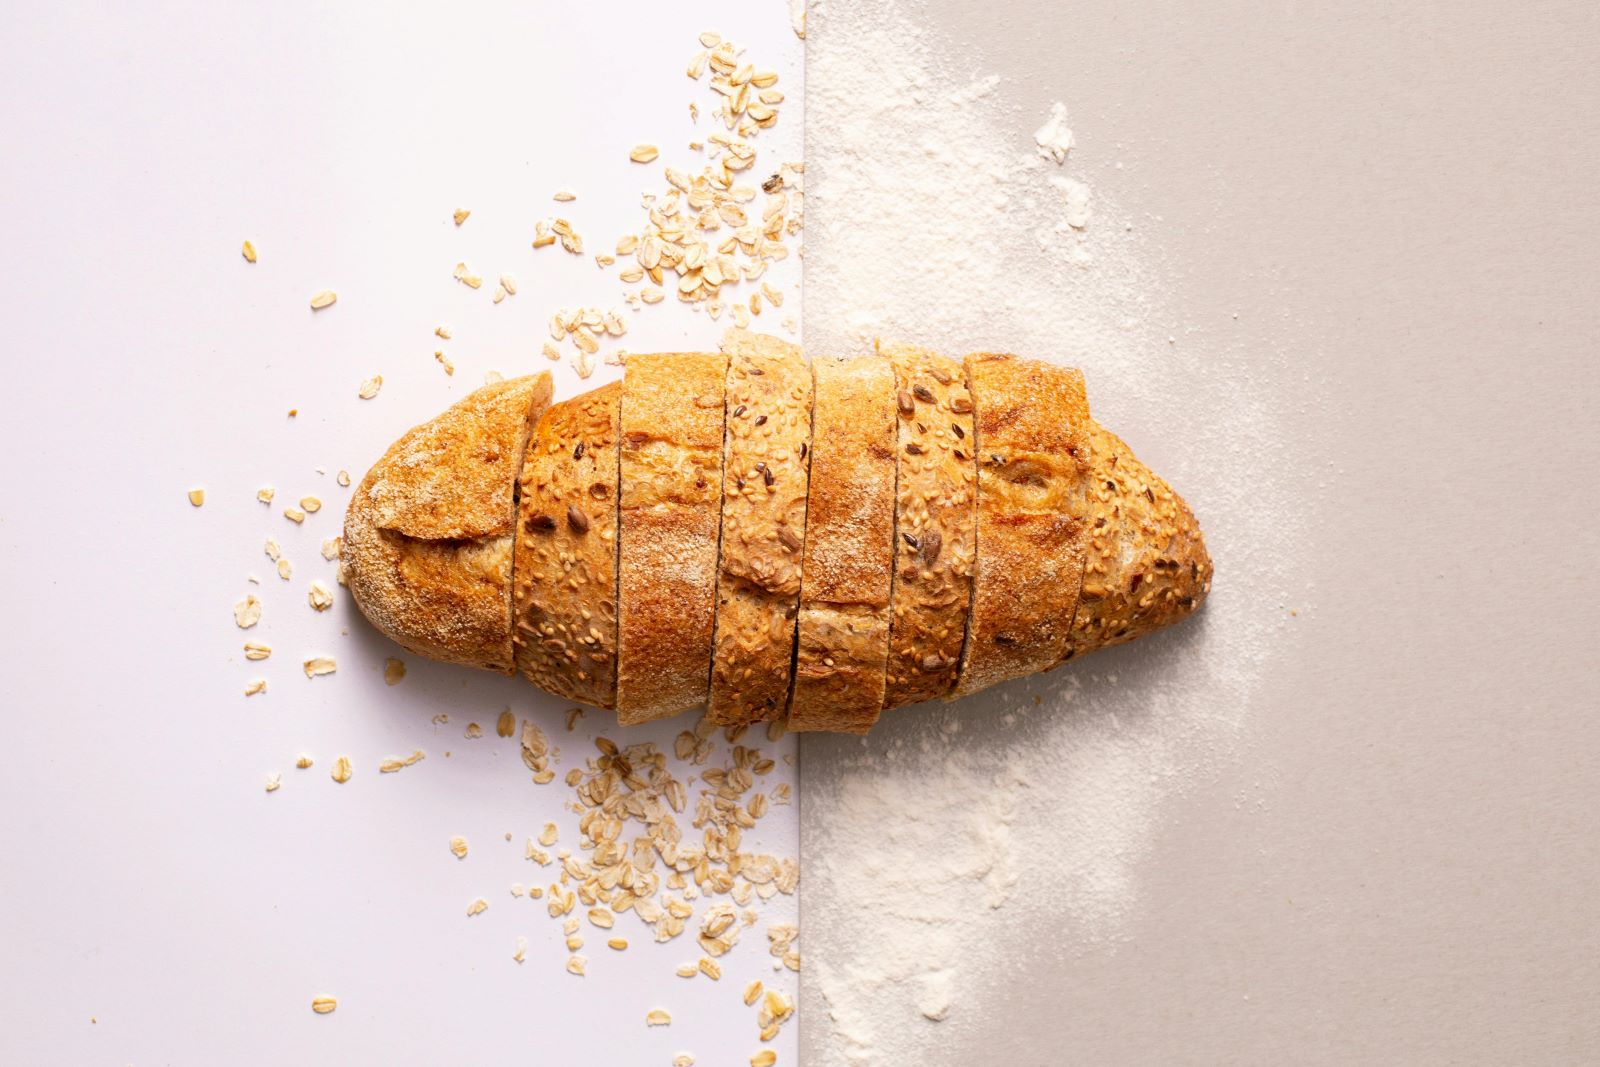
Ingredients for Rye Sourdough Bread
To make your own rye sourdough bread recipe, you will need the following ingredients:
- 100g rye flour (for the starter)
- 100g water (for the starter)
- 200g rye flour (for the dough)
- 300g white flour (for the dough)
- 250g water (for the dough)
- 10g salt
- 150g active rye sourdough starter
This recipe is perfect for one large loaf, yielding a crunchy crust and chewy, flavorful interior. Ensure that your rye starter is active, as it will determine the flavor and texture of the bread.
Steps for Rye Sourdough Bread

Step 1: Preparing the Rye Sourdough Starter
- Mix rye flour and water.
- Let the mixture sit for 24 hours, then feed with more flour and water daily.
- Wait until the starter becomes bubbly and doubles in size.
Step 2: Mixing the Dough
- Combine the starter, water, rye flour, white flour, and salt.
- Mix until a sticky dough forms.
Step 3: Kneading the Dough
- Use the stretch-and-fold method to knead the dough gently.
- Allow the dough to rest between folds to develop strength and texture.
Step 4: Shaping the Loaf
- Gently shape the dough into a round or oval form.
- Place in a proofing basket or bowl and allow it to rise.
Step 5: Baking the Rye Sourdough Bread
- Preheat the oven to 450°F (230°C).
- Transfer the dough onto parchment paper, score the top, and bake in a Dutch oven for 25 minutes with the lid on.
- Uncover and bake for another 20 minutes to develop a crispy crust.
Step 6: Cooling and Slicing
- Cool the bread on a wire rack for at least 30 minutes.
- Slice with a serrated knife once fully cooled.
Step 1: Preparing the Rye Sourdough Starter
A rye sourdough starter is the heart of your bread recipe. It’s the natural leavening agent that gives rye sourdough bread its signature tang and airy texture. Here’s how to prepare it.
What You Need
- 100g rye flour
- 100g filtered water
- A clean jar or glass container
Rye flour contains wild yeast and bacteria, perfect for making a starter. Filtered water is best, as it avoids chemicals that might slow fermentation.
Mixing the Ingredients
Combine 100g rye flour with 100g filtered water in your jar, stirring to create a smooth paste. Cover loosely with a cloth and leave it at room temperature for 24 hours.
Feeding the Starter
After 24 hours, you should see small bubbles. Discard half the mixture and add another 100g of rye flour and 100g of filtered water. Stir and cover again, leaving it to ferment for another 24 hours. Repeat this daily for 3-5 days, discarding half and feeding the starter fresh flour and water each time.
Signs of Readiness
By day three, your starter should be bubbly, with a tangy aroma. If it’s not active yet, keep feeding it until it doubles in size after each feeding. This shows the yeast is ready.
Why Rye Flour is Key
Rye flour helps the wild yeast grow, giving your rye sourdough bread its unique flavor and rise. The starter developed with rye flour will be stronger and more flavorful.
Storing and Maintaining
If you don’t plan to bake immediately, store your starter in the fridge and feed it once a week. When you’re ready to bake, bring it to room temperature, discard half, and feed it fresh flour and water.
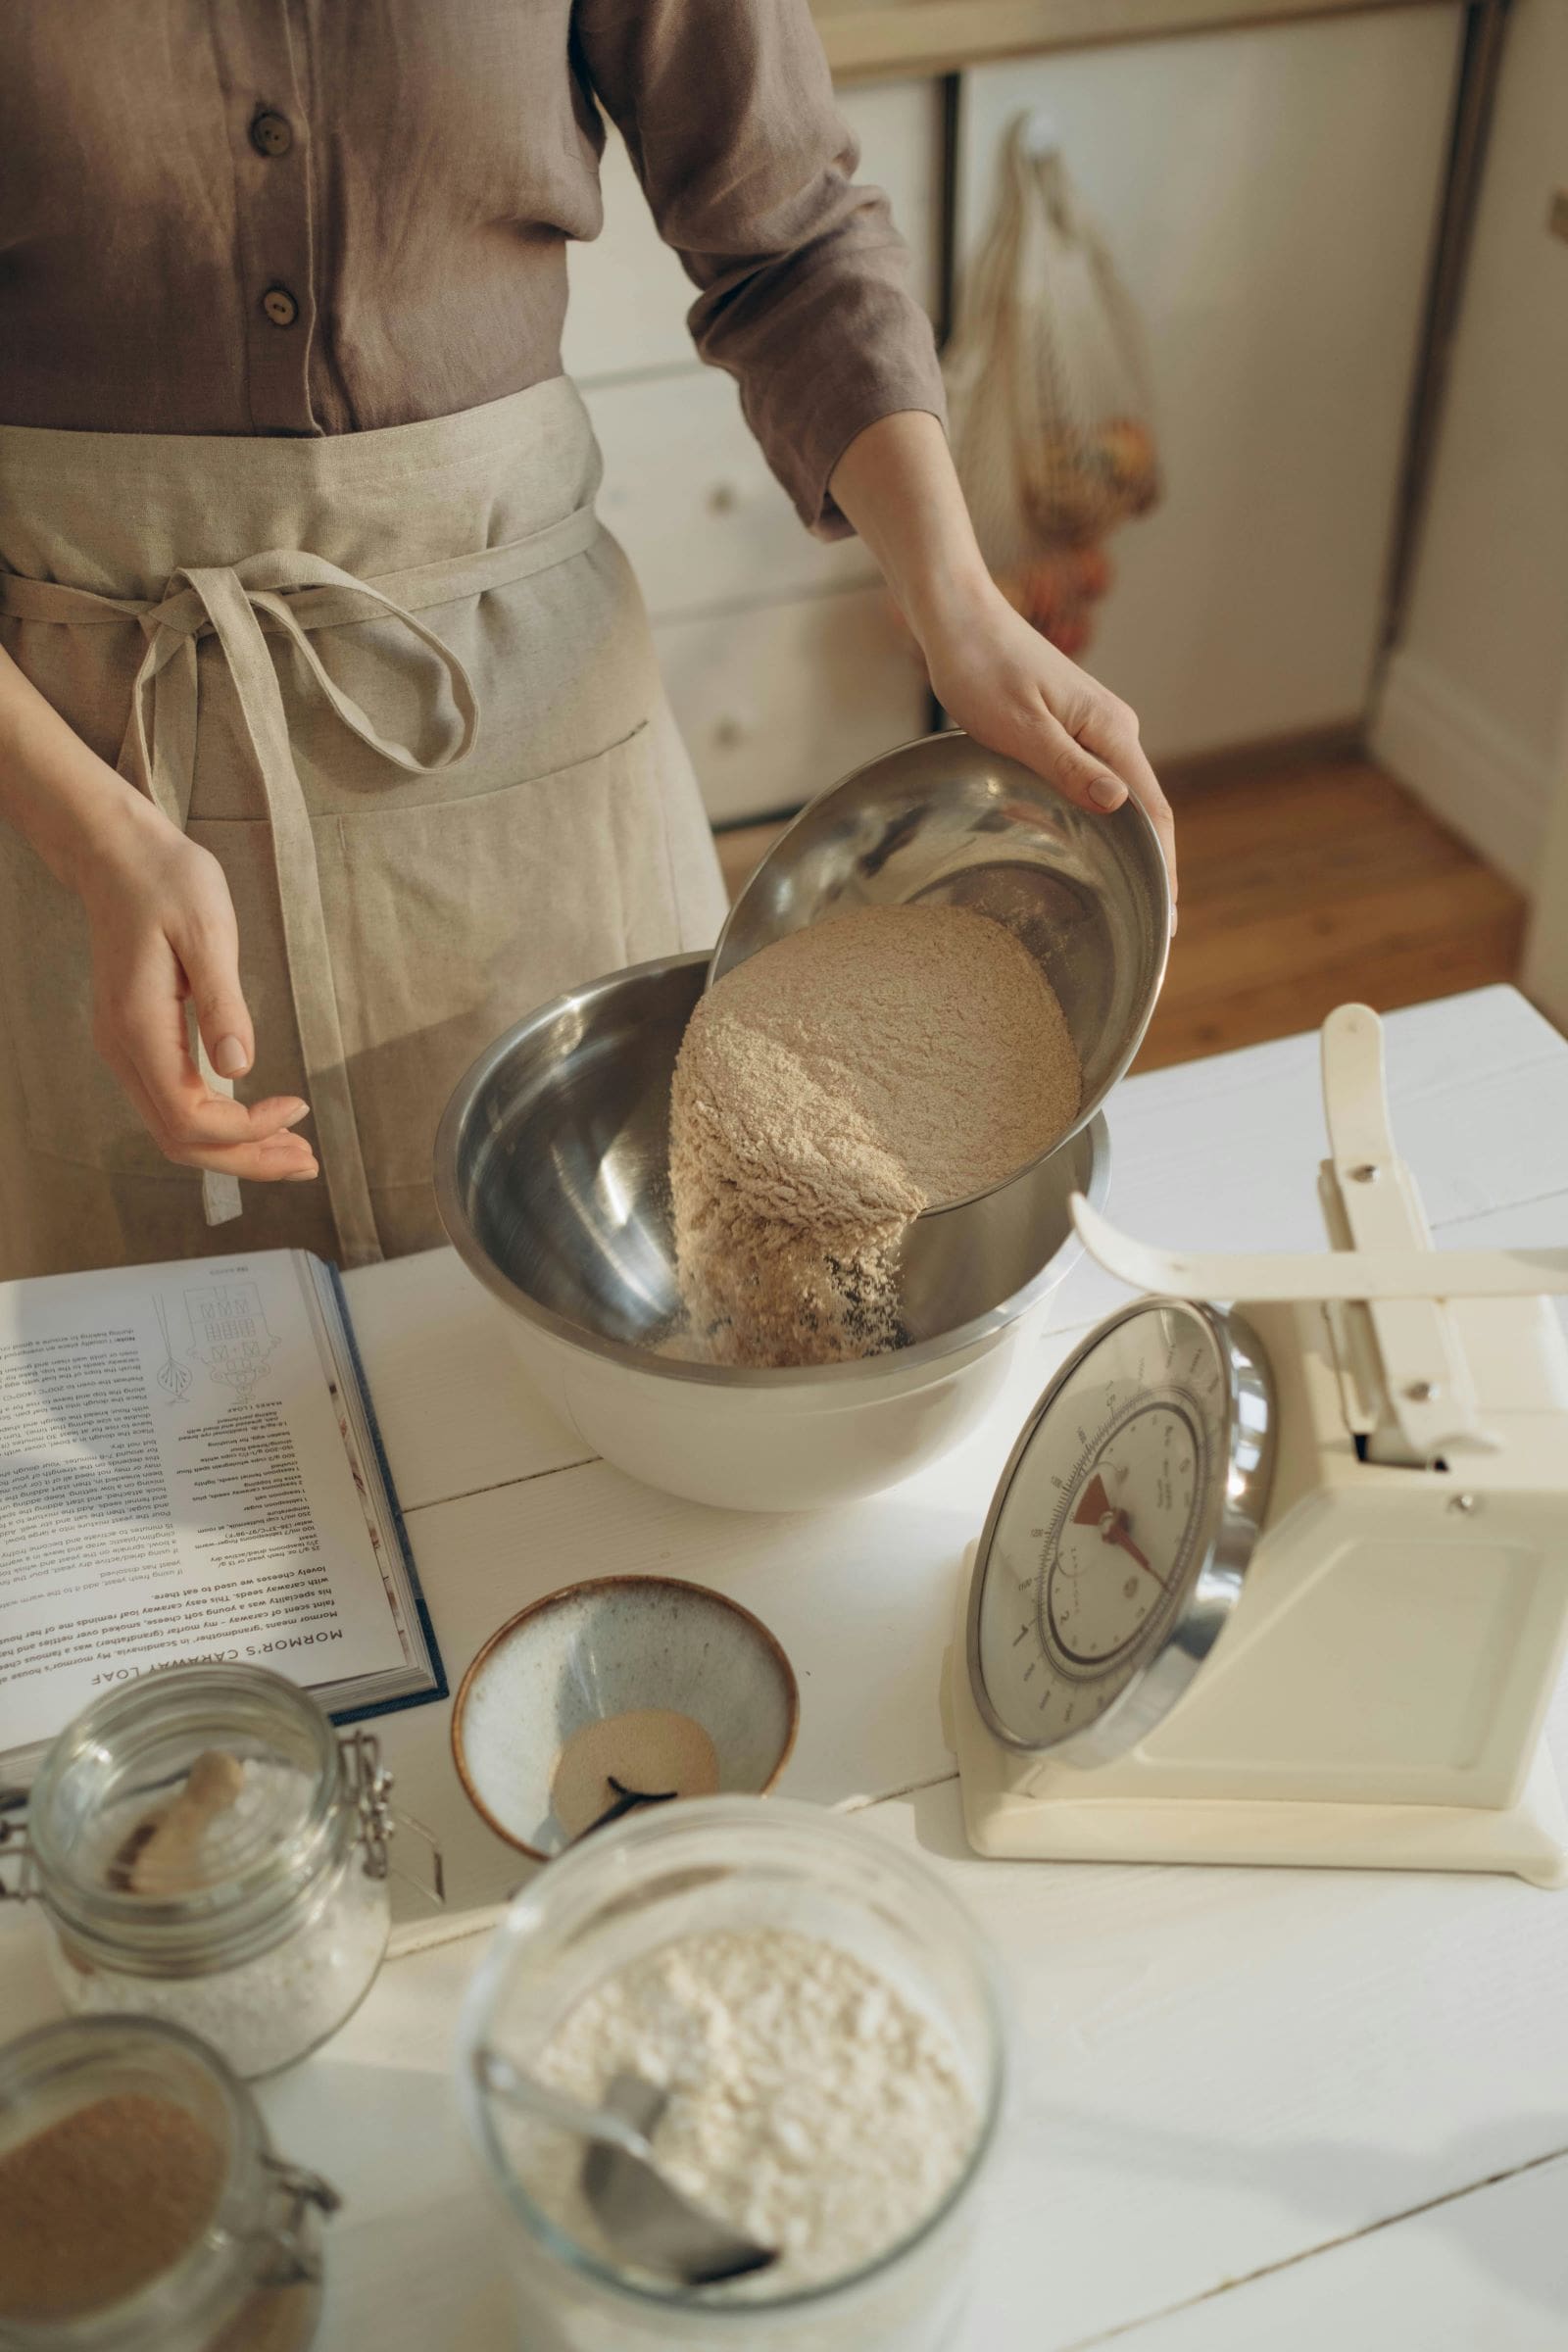
Step 2: Mixing the Dough
Once your rye sourdough starter is ready, it’s time to mix the dough for your rye sourdough bread recipe. The dough for rye sourdough is a bit different from regular sourdough due to the unique properties of rye flour. Here’s how to get it just right.
Using Stand Mixers for Bread Making
A stand mixer can elevate your bread baking experience by saving time and effort while delivering consistent results. For regular bakers, choosing the right stand mixer is essential for achieving the perfect dough.
Check out our guide to find the best stand mixers for kneading bread dough.
Ingredients for the Dough
You’ll need the following:
- 200g rye flour
- 300g white flour
- 250g water
- 10g salt
- 150g active rye sourdough starter
This combination of rye and white flour creates a balanced dough with the perfect texture and flavor for your bread. The white flour helps with gluten formation, while the rye flour brings that signature taste.
Mixing the Dough
Start by combining 200g rye flour and 300g white flour in a large mixing bowl. Add the salt and stir well to evenly distribute it. Gradually pour in 250g of water while mixing with your other hand, creating a rough, sticky dough.
If you have a stand mixer, this step becomes even easier. Simply attach the dough hook and mix on a low speed until the ingredients come together. This will save you time and ensure the dough is thoroughly mixed.
Next, incorporate the 150g of your active rye sourdough starter into the dough. It’s important that the starter is well-mixed, as it helps the dough rise and develop flavor.
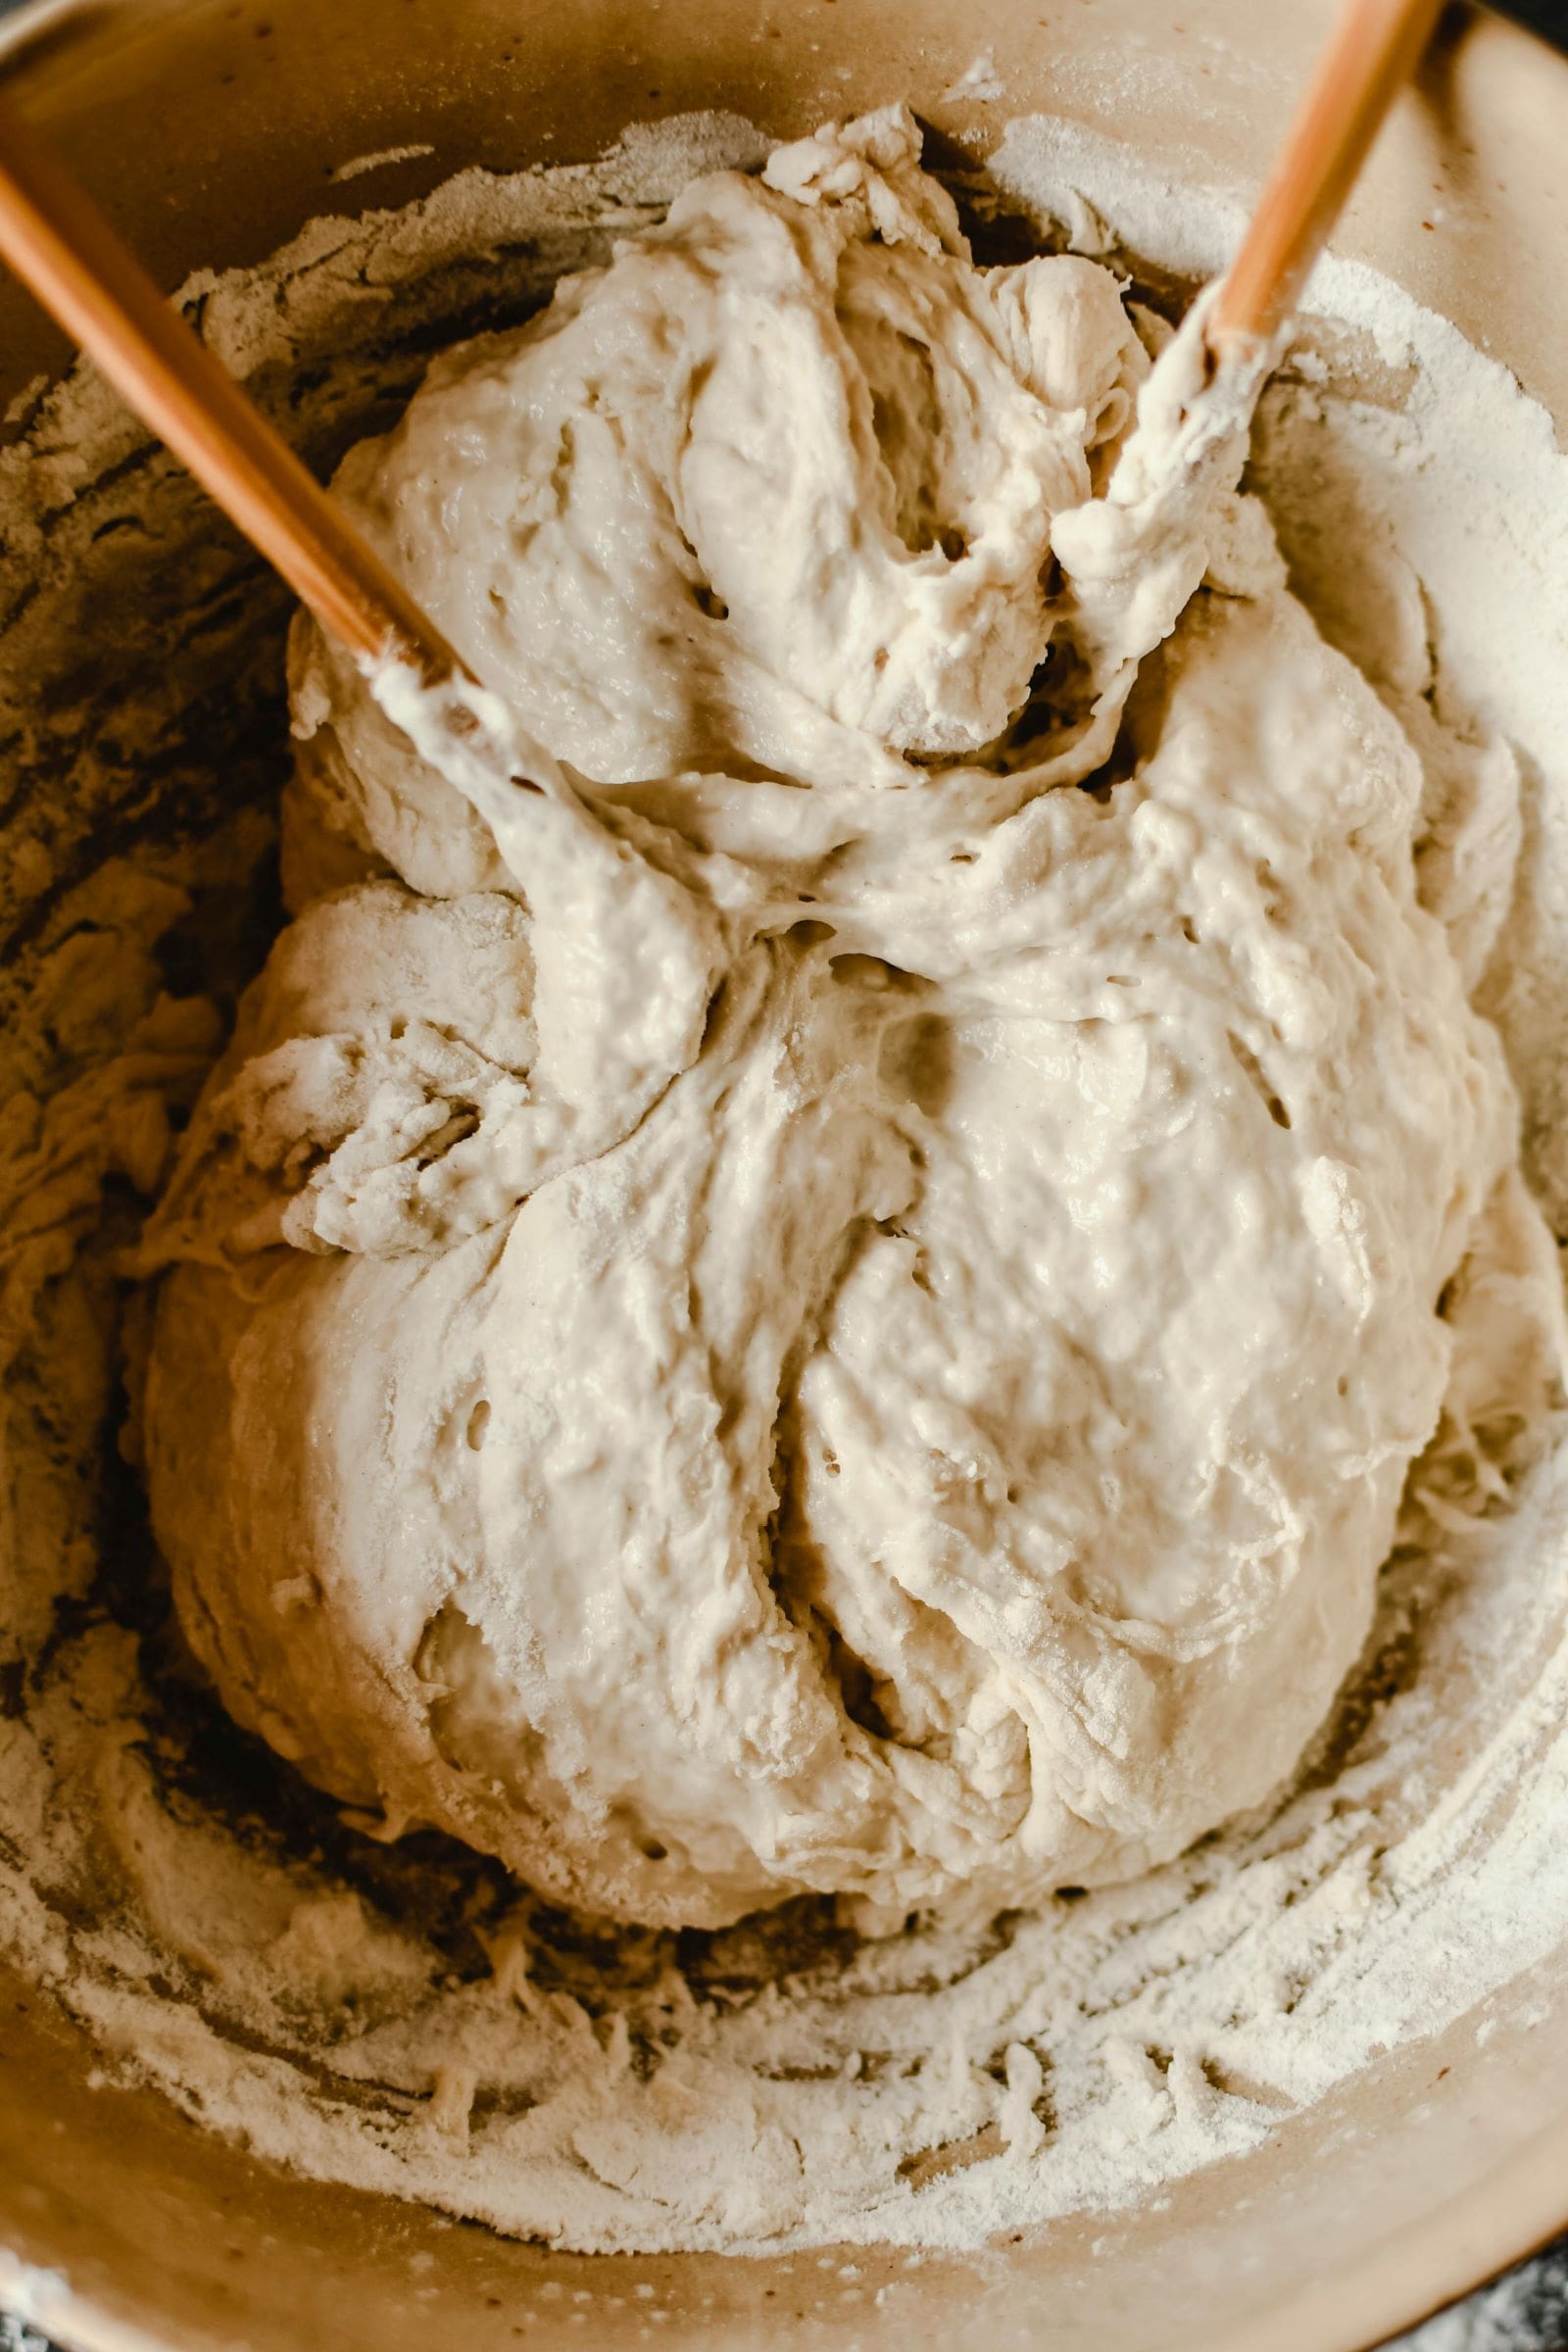
The Consistency
Rye dough tends to be stickier and wetter than regular wheat-based dough. Don’t worry if it feels a little challenging to handle—it’s perfectly normal. The high hydration of the dough helps create the dense, chewy texture that makes rye sourdough bread so special.
Letting It Rest
After mixing, cover the dough with a damp cloth or plastic wrap. Let it rest for about 30 minutes. This resting period allows the flour to absorb the water fully and for the dough to relax, making the next steps easier.
By following these steps, you’ll be well on your way to making a fantastic rye sourdough bread recipe.
Step 3: Kneading the Dough
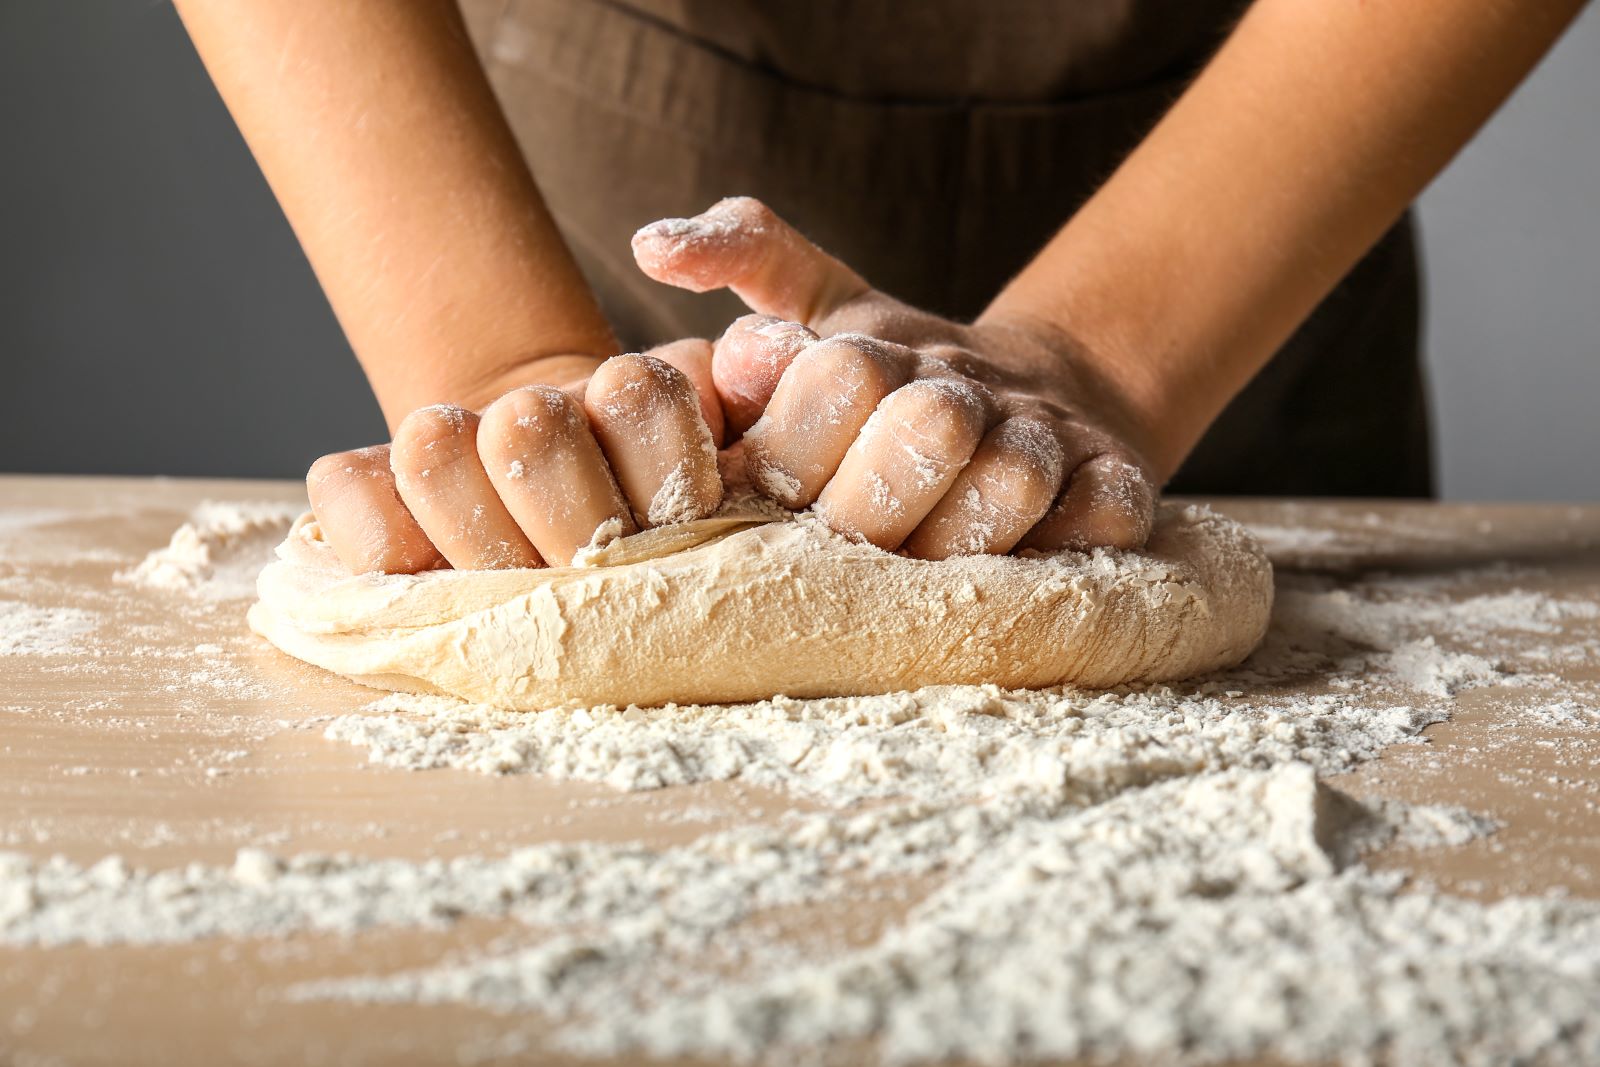
Kneading is a crucial step in the rye sourdough bread recipe, although it differs from traditional kneading techniques used for wheat dough. Rye dough is more delicate and requires a gentler approach, but this doesn’t make the process any less important. The goal is to build strength and structure while keeping the dough’s unique texture intact.
Minimal Kneading for Rye Dough
Unlike wheat dough, rye dough doesn’t develop as much gluten, so it doesn’t require the intense kneading typical of white bread. Instead, you’ll use a method called “stretch and fold.” This technique helps build the dough’s strength without overworking it.
Start by lightly flouring your work surface, and then transfer your dough. Gently pull one side of the dough upwards, stretching it, and then fold it back onto itself. Rotate the dough 90 degrees and repeat the process. You can use your hands or a dough scraper for this, but be gentle to avoid breaking the dough.
Rest Periods Between Kneads
Rye dough benefits from short rest periods during kneading. After each fold, let the dough rest for about 10 minutes. This allows the dough to relax and the flour to absorb the water more fully, making the dough easier to work with. These rest periods are vital in creating the airy crumb that will form inside your rye sourdough bread recipe.
The Right Texture
After about an hour of folding and resting, the dough should feel elastic yet still sticky. It won’t be as smooth as wheat-based dough, but it will hold together. This texture is what will help your rye sourdough bread rise properly in the next stages.
By using this gentle kneading method, you’ll ensure that your dough develops enough strength for a great rise without compromising its unique, dense texture.
Step 4: Shaping the Loaf

Shaping the dough is an important step in the rye sourdough bread recipe. It helps define the final shape and texture of the loaf. Although rye dough is more delicate than wheat dough, you can still achieve a beautiful, rustic loaf with the right technique.
Turn Out the Dough
Once your dough has rested and fermented, it’s time to shape it. Turn the dough out onto a lightly floured surface. Rye dough tends to be sticky, so you may need a dough scraper to help lift it without deflating the air bubbles you’ve worked hard to create.
Gently Form a Round Shape
Using your hands, gently press the dough into a rectangle. Start folding the edges towards the center, creating a tight ball. The goal is to maintain a bit of tension on the surface of the dough, which will help it hold its shape while baking. Rye dough is more fragile than wheat, so avoid pressing too hard.
Resting the Shaped Dough
Once the dough is shaped into a ball or round loaf, place it into a proofing basket or bowl that’s been generously dusted with flour. This helps prevent sticking and ensures the dough holds its shape during the final rise. Cover the dough with a damp cloth or plastic wrap and allow it to rest for 3 to 4 hours. During this time, the dough will expand and rise, preparing it for baking.
Final Shape Considerations
If you prefer a more rustic look, you can shape the dough into a freeform boule or a round loaf. However, you can also shape it into an oblong or oval shape depending on your preference. The final shape of your rye sourdough bread recipe is up to you, but remember that rye dough will be denser, so be mindful of the final volume.
By following these steps, you’ll ensure that your loaf has a beautiful, rustic shape and is ready for its final rise before baking.
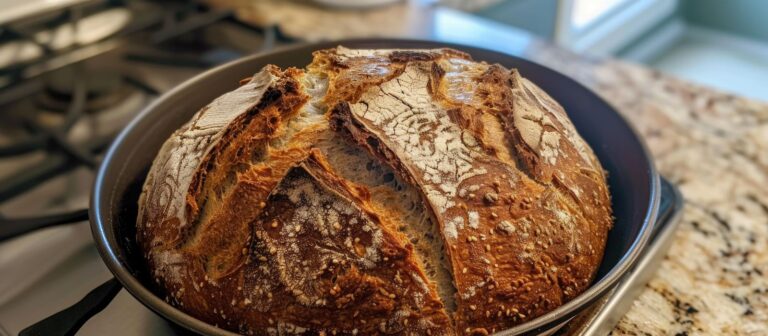
Step 5: Baking the Rye Sourdough Bread
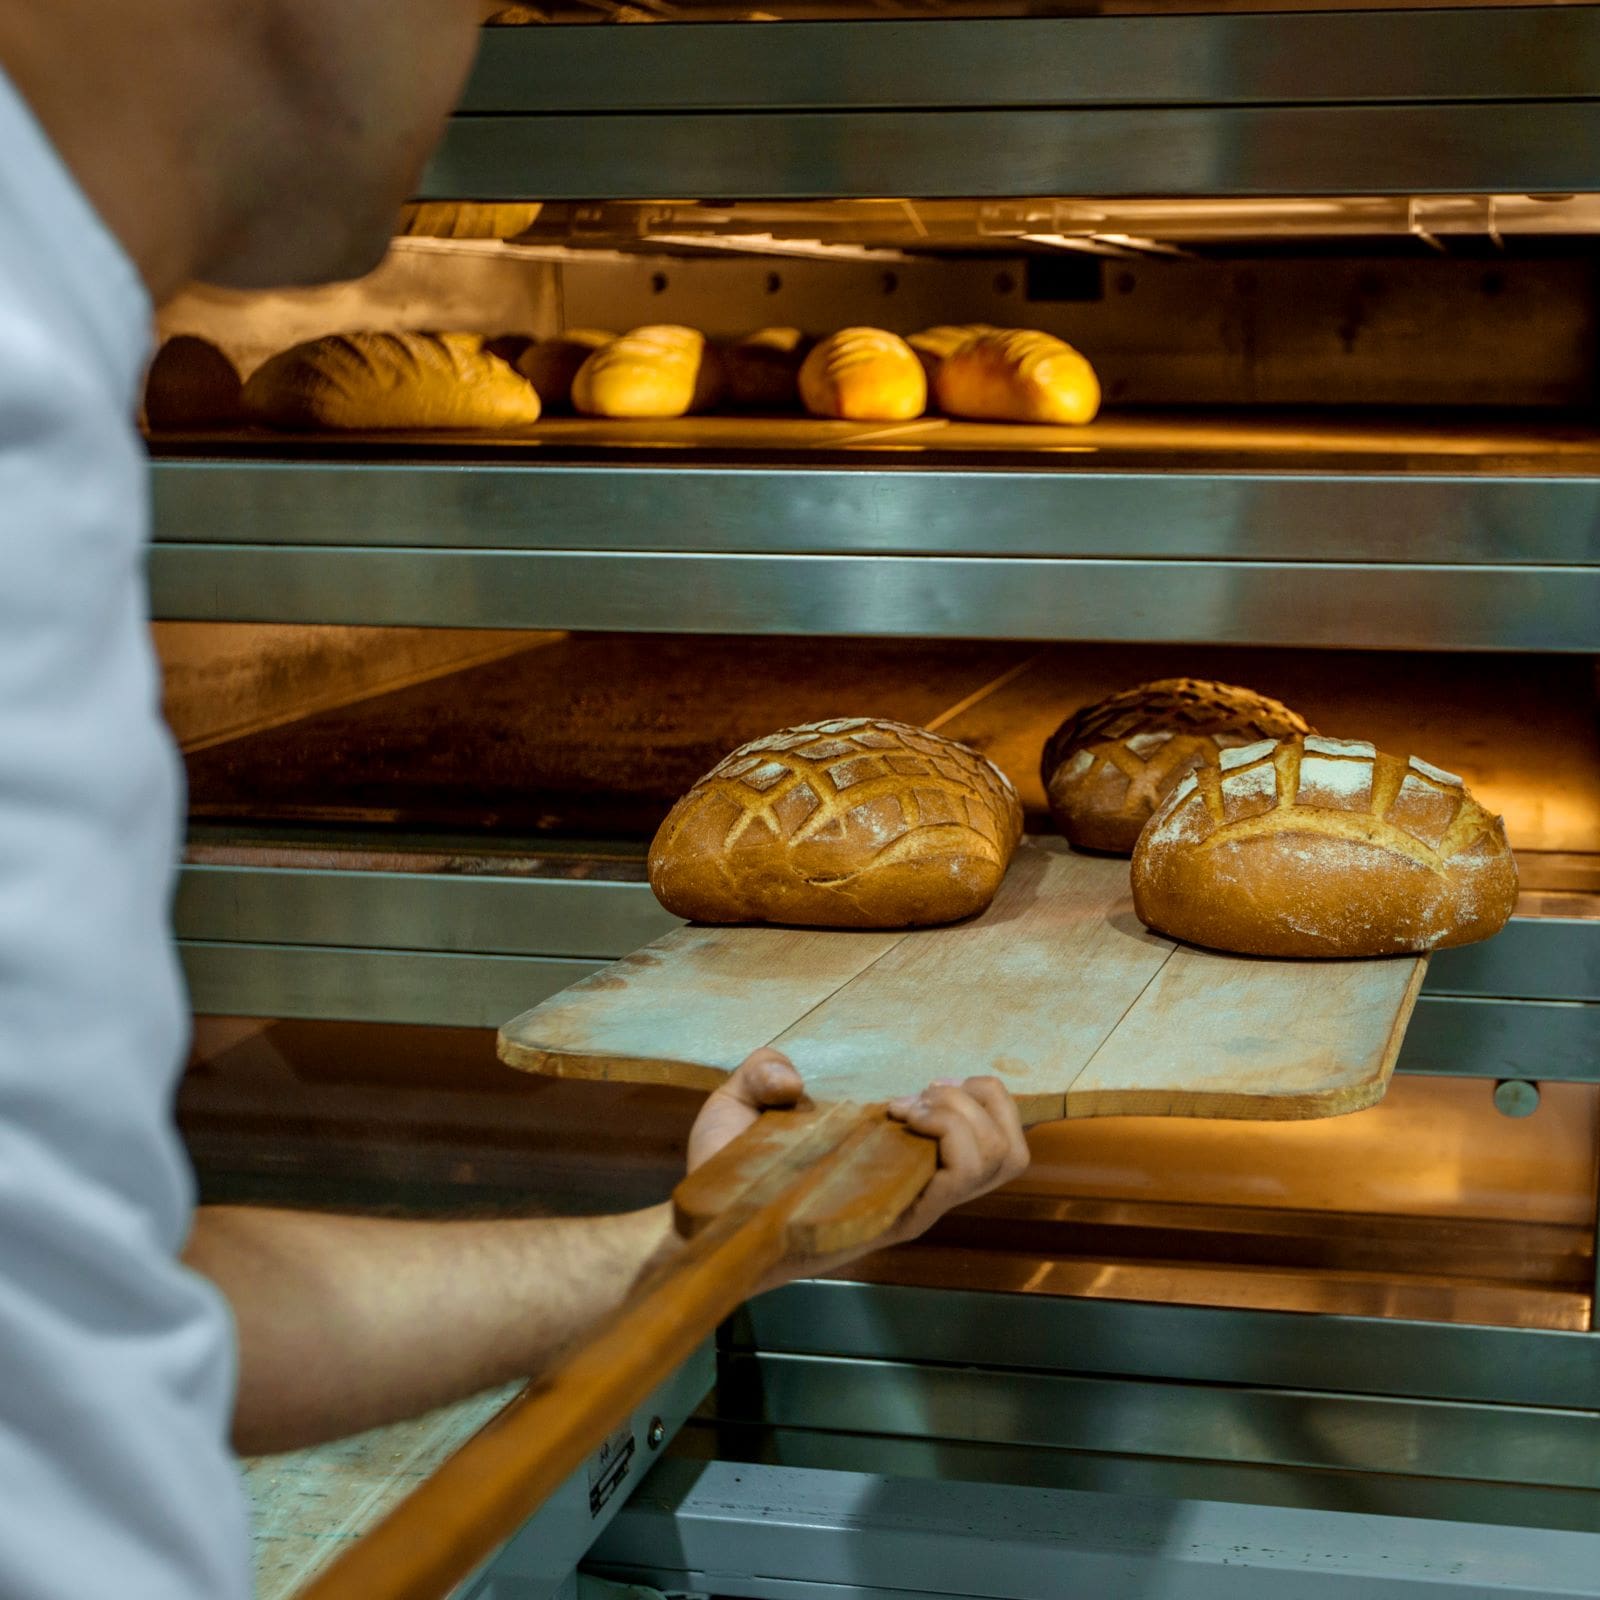
Baking the rye sourdough bread is the final step in transforming your dough into a delicious, crusty loaf. The baking process helps develop the flavor, texture, and beautiful golden crust that you’ve been working towards. Here’s how to get the perfect bake.
Preheat the Oven
Start by preheating your oven to 450°F (230°C). It’s essential to make sure the oven is hot enough to create the perfect crust. If you’re using a Dutch oven, place it inside the oven while it preheats. This helps create a steam effect during baking, which is key for a crispy, crunchy crust.
Preparing the Dough for the Oven
Once the dough has completed its final rise, it’s time to transfer it to the oven. Carefully flip the dough from your proofing basket or bowl onto a piece of parchment paper. Be gentle to avoid deflating the dough too much. Using a sharp knife or razor blade, score the top of the dough with a few shallow cuts. This allows the dough to expand in a controlled manner while baking.
Baking the Loaf
Place the dough, still on the parchment paper, into the preheated Dutch oven. Cover with the lid and bake for the first 25 minutes. The enclosed environment creates steam, which helps the bread rise and form a golden crust.
After 25 minutes, remove the lid and continue baking for another 20-25 minutes. This will allow the loaf to develop a deep, golden-brown color and crisp up. Keep an eye on it to ensure the crust doesn’t burn.
Cooling the Bread
Once your rye sourdough bread is beautifully golden and crisp, remove it from the oven. Let it cool on a wire rack for at least 30 minutes before slicing. Cooling allows the crumb to set and makes for a better texture when cutting.
By following these steps, you’ll bake a perfect rye sourdough bread recipe with a flavorful, crunchy crust and chewy interior.
Step 6: Cooling and Slicing
The cooling and slicing stages are crucial for your rye sourdough bread recipe. Rushing through this process can affect the texture and flavor, so it’s important to give the bread time to settle.
Allowing the Bread to Cool
Once your bread is out of the oven, place it on a wire rack to cool. This step helps the steam inside the loaf escape, allowing the crust to stay crispy. Let the bread cool for at least 30 minutes before slicing. Cutting into the bread too early can result in a gummy, overly moist crumb. The cooling period allows the crumb to set and solidify, giving you that perfect texture when you slice.
Why Cooling Matters
Cooling also enhances the flavor of your rye sourdough bread. As the bread rests, the complex flavors from the fermentation process continue to develop. Additionally, the temperature of the loaf affects how the crumb forms, so patience is key. It’s tempting to dive in right away, but waiting for the bread to cool down results in a much better eating experience.
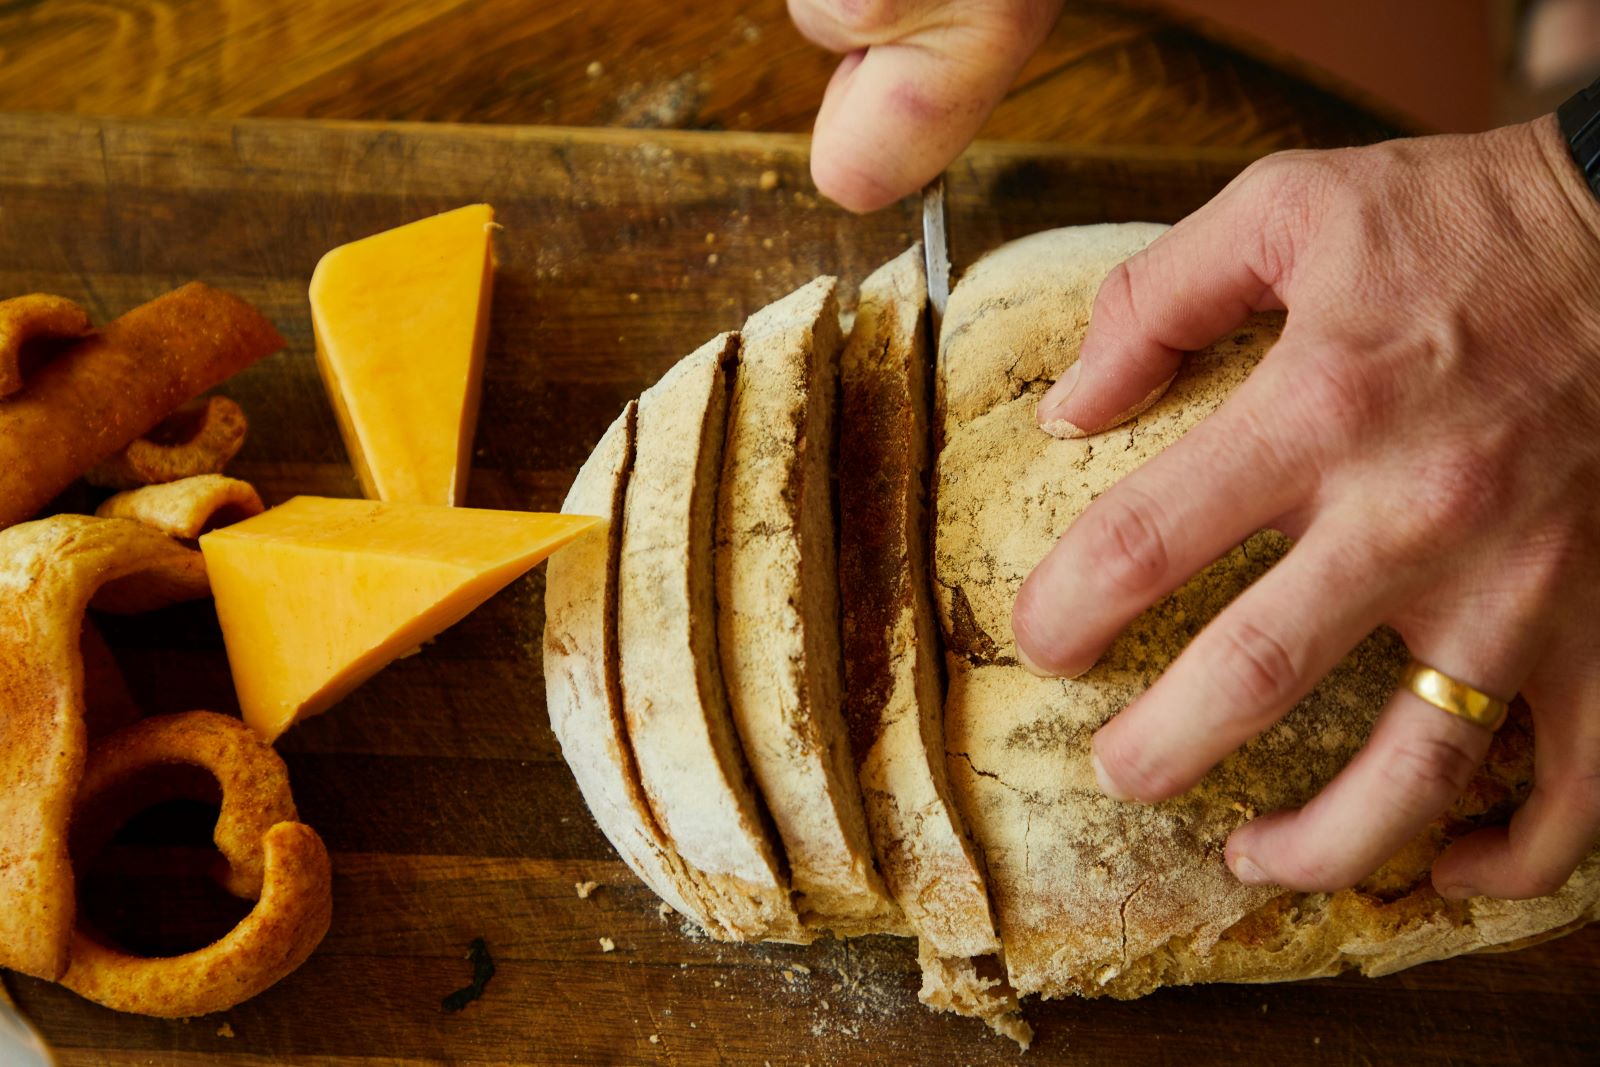
Slicing the Bread
After the bread has cooled, you can slice it. Use a serrated bread knife to gently cut through the crust without squashing the loaf. Rye sourdough bread is denser than regular sourdough, so be sure to slice it with a steady, even pressure to get clean cuts. Thick or thin slices are up to you, depending on how you plan to enjoy your bread.
Storing Leftover Rye Sourdough Bread
If you have leftover rye sourdough bread, store it in a paper bag or wrap it in a cloth. Avoid plastic, as it can make the crust soggy. If you plan to keep it for more than a couple of days, consider freezing the slices.
By allowing the bread to cool and slicing it carefully, your rye sourdough bread recipe will be at its best for enjoying with butter, cheese, or any spread you love.
Check out some other great articles!


Tips for the Perfect Rye Sourdough Bread

Making the perfect rye sourdough bread recipe takes practice, but these tips can help you achieve a loaf with great flavor, texture, and rise every time. Keep these pointers in mind as you work through the process.
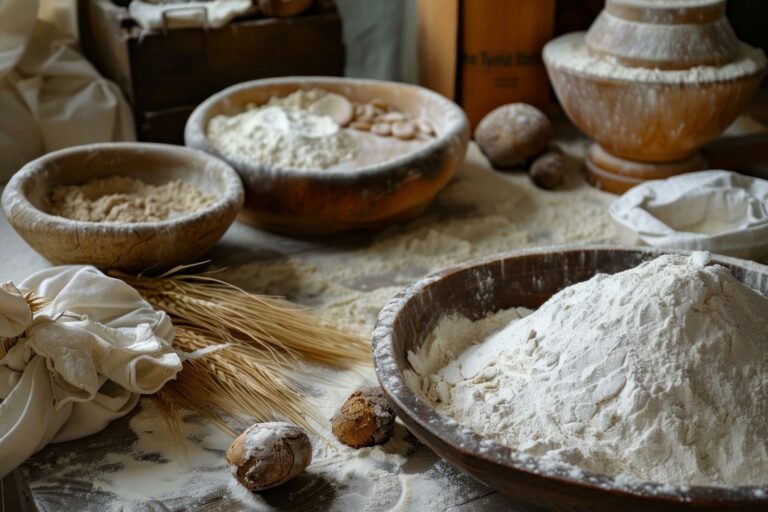
Use High-Quality Flour
The flour you use plays a big role in your rye sourdough bread recipe. Opt for fresh, high-quality rye and bread flour. Rye flour with a higher protein content will yield a stronger dough, which improves the rise and texture. The freshness of your flour is crucial as well—old flour can negatively impact the flavor and fermentation process.
Be Patient with Fermentation
Patience is key when it comes to fermentation. Rye dough often takes longer to ferment than wheat-based dough. Allow enough time for both the starter and the dough to ferment fully. Rushing the process can result in a dense loaf with less flavor. Always be sure to give your dough enough time to rise and develop the complex flavors that rye sourdough is known for.
Watch the Hydration Level
Rye flour absorbs water differently from white flour. If you find your dough too sticky, add a little extra flour during kneading, but keep it hydrated. Too little water can result in a dry loaf, while too much can make it too hard to shape. Getting the right balance of hydration is important for the texture and overall crumb structure.
Control the Oven Temperature
Baking at the right temperature is crucial for creating that perfect, crispy crust. Make sure your oven is preheated to 450°F (230°C) before placing your loaf inside. If you’re using a Dutch oven, this will help create the necessary steam for a good rise. After the initial 25 minutes, lower the temperature to 400°F (200°C) to finish the bake without burning the crust.
Don’t Skip the Resting Time
Resting your dough is just as important as kneading and shaping. After mixing and kneading, let the dough rest to develop its texture. Similarly, allow the bread to cool completely after baking before slicing. Cutting into hot bread can alter the texture, making it more gummy and less flavorful.
Experiment with Add-ins
For extra flavor and texture, consider adding seeds or grains like caraway, sunflower seeds, or oats to your rye sourdough bread recipe. These ingredients can enhance the flavor and provide some crunch, giving your bread a unique twist while still maintaining the traditional rye flavor.
Maintain Your Starter
A strong, healthy starter is key to a successful rye sourdough bread recipe. Take care of it by feeding it regularly, especially if you plan to bake often. The longer you maintain your starter, the better the bread will taste. Don’t be discouraged if it takes a few tries to get the starter just right—practice makes perfect.
By following these tips, you can consistently bake a delicious loaf of rye sourdough bread that’s flavorful, airy, and perfectly textured.
Why Bake Rye Sourdough Bread?
Baking rye sourdough bread at home is a deeply rewarding experience. The process transforms simple ingredients into a loaf rich in character, taste, and nutrition. Rye flour, with its distinctive properties, creates bread with a dense crumb, a mild tang, and an unmistakable rustic appeal. This section explores why this type of bread is so special and why a rye sourdough bread recipe should be in every home baker’s repertoire.
A Flavor Unlike Any Other
Rye flour brings a deep, earthy taste to bread. Unlike regular wheat-based sourdough, rye sourdough develops a unique complexity during fermentation. The mild sweetness of rye flour contrasts beautifully with the tangy depth of sourdough culture. This balance of flavors makes each bite more satisfying.
Fermentation also amplifies the natural aromas of rye. The process releases subtle fruity, nutty, and even slightly malty notes. Toasting a slice further enhances these qualities, creating a warm, inviting scent that fills the kitchen.
Nutritional Benefits That Stand Out
Rye sourdough bread is more than just delicious; it’s packed with nutrients. Rye flour contains higher amounts of fiber compared to wheat flour, aiding digestion and promoting gut health. The fermentation process enhances nutrient absorption by breaking down phytic acid, making minerals like iron, magnesium, and zinc more bioavailable.
In addition, rye sourdough has a lower glycemic index than many other breads. This means it leads to a slower release of glucose into the bloodstream, helping to maintain stable energy levels. If you’re looking for a wholesome addition to your diet, this bread is a fantastic choice.
A More Digestible Option
Many people find rye sourdough easier to digest than conventional bread. The natural acids in sourdough help pre-digest starches and proteins, making them gentler on the stomach. Since rye contains less gluten than wheat, the bread has a softer, less elastic structure that some individuals find easier to tolerate.
For those sensitive to gluten but not allergic, a properly fermented rye sourdough bread recipe offers a delicious alternative without compromising texture or taste. The extended fermentation time further reduces gluten content, making the loaf even more digestible.
A Bread That Stays Fresh Longer
One of the standout advantages of baking with rye is its ability to retain moisture. This characteristic keeps rye sourdough bread fresh for longer than typical wheat loaves. The natural acids in sourdough also act as preservatives, slowing down mold growth and preventing staleness.
Unlike store-bought bread, which often goes dry within days, a well-made rye sourdough loaf remains tender for nearly a week. Simply wrap it in a cloth or store it in a bread box to maintain its freshness.
A Rich History in Every Loaf
Rye bread has deep roots in culinary traditions across Europe and beyond. From the dark, hearty loaves of Scandinavia to the tangy, spiced breads of Eastern Europe, rye has been a staple grain for centuries. Its resilience in harsh climates made it an essential food source for many cultures.
Baking a rye sourdough bread recipe connects you to this long-standing tradition. It’s more than just a loaf—it’s a piece of history, lovingly crafted and shared across generations. Whether you’re rediscovering old-world baking or exploring rye for the first time, each bake is an experience worth savoring.
FAQs for Rye Sourdough Bread Recipe
How long does it take to make rye sourdough bread?
Making a rye sourdough bread recipe takes time, typically around 3-5 days. This includes preparing the starter, fermenting the dough, and allowing the bread to rise properly. Each step is crucial for developing the unique flavor and texture that rye sourdough bread is known for.
Can I use all rye flour for my rye sourdough bread recipe?
While you can use all rye flour, it’s best to mix it with some bread flour for better gluten development. Rye flour lacks the gluten strength of wheat, making the dough denser. Using a combination will help achieve a lighter, more airy loaf.
How do I know when my rye sourdough starter is ready?
Your rye sourdough starter is ready when it’s bubbly, active, and doubles in size after each feeding. The starter should have a tangy smell, indicating the fermentation process is working. If it’s not rising well, continue to feed it regularly and give it more time.
Can I bake rye sourdough bread without a Dutch oven?
Yes, you can bake rye sourdough bread without a Dutch oven. A baking stone or a regular baking sheet can also work. However, using a Dutch oven traps steam, helping to create a nice, crispy crust, which enhances the texture of your rye sourdough bread recipe.
How should I store rye sourdough bread?
Store your rye sourdough bread in a paper bag or wrapped in a cloth. This keeps the crust crisp while allowing the bread to breathe. If you want to store it for longer, freezing slices is a great option to maintain freshness and texture in your rye sourdough bread recipe.
Amazon and the Amazon logo are trademarks of Amazon.com, Inc, or its affiliates.